
7. Clip off any excess leads that protrude through the
hole in the board.
8. If necessary, clean the area around the soldered con-
nection with a flux-remover solvent to maintain good envi-
ronmental characteristics,
Replacing Components on Metal Terminals
When soldering metal terminals (e.g., switch terminals,
potentiometers, etc.) ordinary 60/40 solder is satisfactory. The
inch chisel tip.
1. Apply only enough heat to make the solder flow freely
and form a good electrical connection. Excess solder may
impair the operation of the circuit or cover a cold solder
joint.
2. Clip off excess wire that may extend past the soldered
connection and clean with flux-remover solvent,
Removing and Replacing Switches
Single wafers on the VOLTS/DIV or DISPERSION-COUPLED
RESOLUTION switches are not normally replaced. If any of
these wafers are defective, the entire switch should be
replaced. It can be ordered through your Tektronix Field
office, either unwired or wired, as desired. Refer to the
Electrical Parts List to find the unwired or wired switch part
numbers.
CAUTION
When disconnecting or connecting leads to a
wafer-type switch, do not let solder flow around
and beyond the rivet on the switch terminal. Exces-
sive solder can destroy the spring tension of the
contact.
TROUBLESHOOTING
Attempt to isolate trouble to one circuit through opera-
tional and visual checks. Verify that the apparent trouble
is actually a malfunction within the Type 491 and not
improper controls setting or malfunctioning associated equip-
ment. Note the effect the controls have on the trouble symp-
toms. Normal and abnormal operation of each control helps
establish the location and nature of the trouble, Control
functions are described in the Operations section.
Check the instrument calibration or the calibration of the
affected circuit. The trouble may be corrected after calibra-
tion, The calibration procedure is given in Section 6. Before
changing any adjustment settings during this check, note the
position of the adjustment, so it can be returned to its original
position after the check. This will facilitate recalibration after
the trouble has been found and corrected.
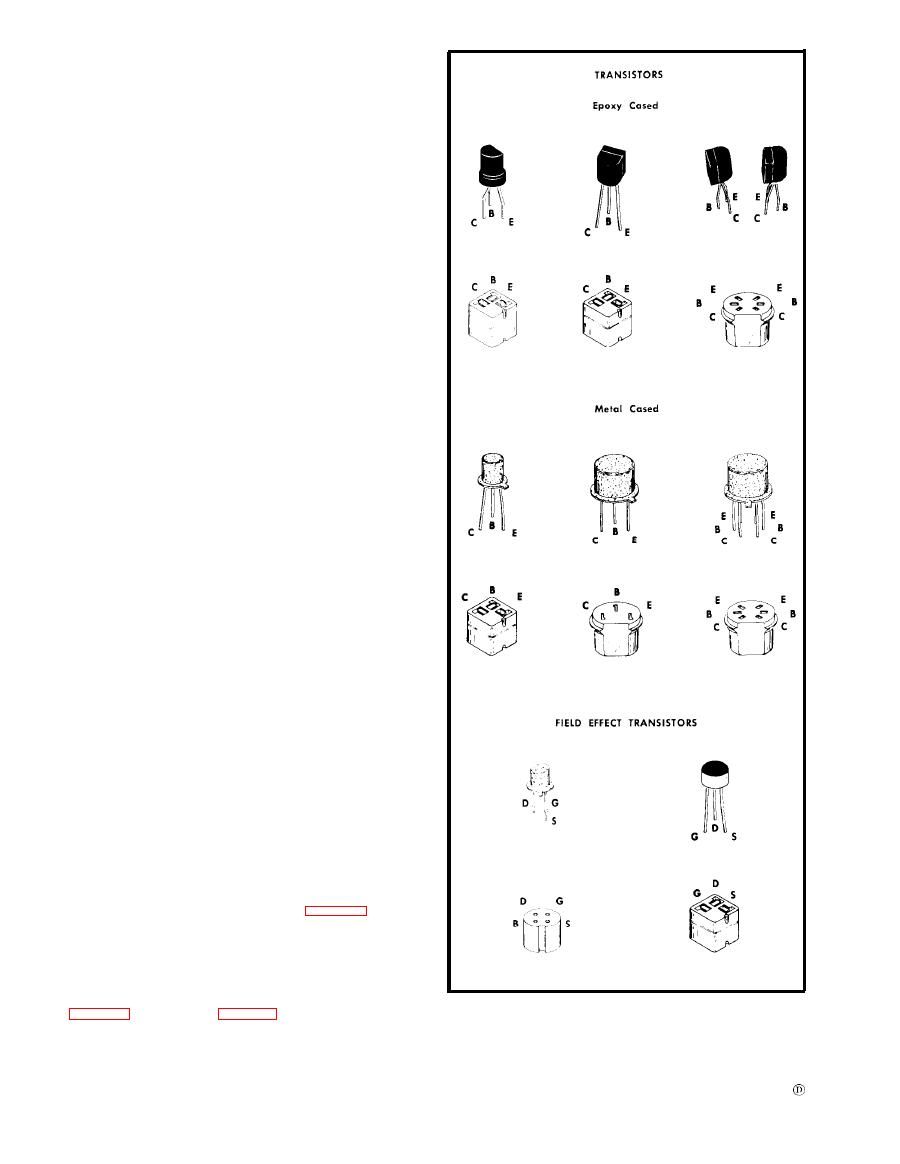
those shown
4-26 provide
board wiring drawings and component layout
information.
It is usually best, if the trouble is not isolated
to a circuit,
field effect transistors.
4-18

