
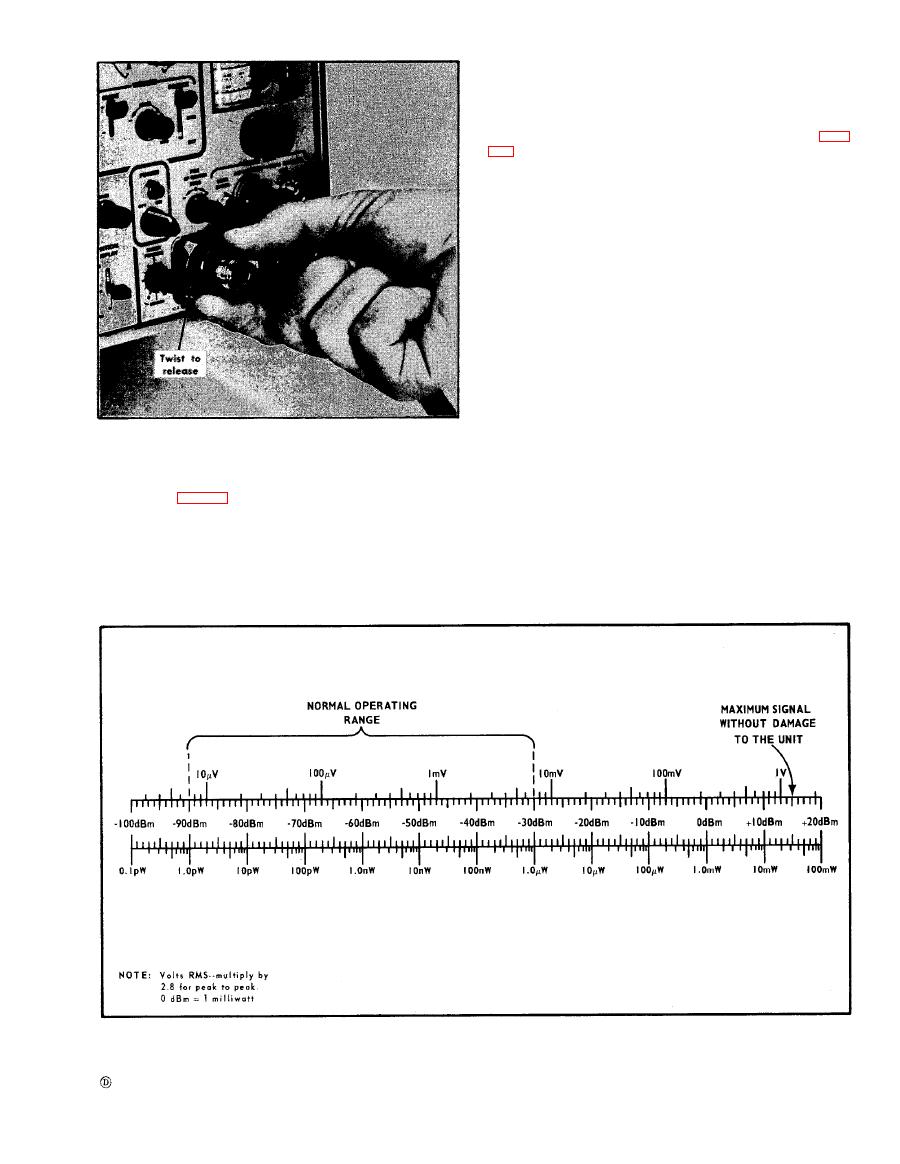
Signal input power to the analyzer should not exceed -30
dBm. Signal above this level will overload the 1st mixer and/
or the 1st IF stage and generate spurious signals on the dis-
play. Add at least 10 dB of attenuation to the input when
the signal begins to compress (no increase of signal amplitude
with an increase of signal level). A conversion chart (Fig.
CAUTION
Signals stronger than +15 dBm applied to the
input or mixer will damage or burn out the mixer
Mismatches between the signal source and the RF INPUT
connectors may be caused by signal source output imped-
ance, long coaxial cables, etc. These mismatches will ad-
versely affect display flatness. When optimum flatness is
desired and signal strength is adequate, a 50 Ω attenuator
pad of approximately 6 to 10 dB should be added between
the signal source and the input to the mixer. The addition
of the attenuator will minimize reflections and optimize dis-
play flatness.
Three attenuator pads, 10 dB, 20 dB and 40 dB are sup-
The Mixer Adapter or Coaxial Mixer may be removed from
plied with the accessories kit, These three attenuators may
the input receptacle by turning the retainer ring in either
be stacked on the N type connector to provide up to 70 dB
direction. See Fig. 2-7. To replace either assembly, push the
attenuation. A support should be provided however, if
adapter or coaxial mixer against the spring until the flange
more than 2 attenuators and an N to BNC adapter are
bottoms, then turn until the latch snaps to hold the unit in
stacked on the band A connector. The attenuators are rated
place.
at 2 watts (average).
Ω
2-9
